
I like the idea of rubber stamping because it allows you to reuse the same designs over and over. This is especially handy for making cards or gift tags where duplicates are often required. My problem has always been that the regular craft stores often don't have designs or words that I love. While shopping I'm typically thinking if only this were in a different font, if only this were larger, or if only there were a stamp with an avocado and a pineapple doing the tango.
Lessons Learned From Making My First Stamp
This week I made my first rubber stamp. This is something I've been wanting to try for a couple of years. I finally bought some carving tools and a stamp block because I knew that if I had the tools then I wouldn't have any more excuses!
I made a super simple stamp. I'm the type of crafter who tries to do a very simple project the first time. My goal is to just figure out the technique. I've learned that if I try to make something amazing and try to learn a new technique at the same time, then I'll be frustrated. The finished item just won't look like the beautiful photos taken by very experienced crafters on Pinterest. With the bar set very low (my goal is to stamp something), I know that I'll be happy and be able to continue to build up my skills.
Here's what I learned:
Tools
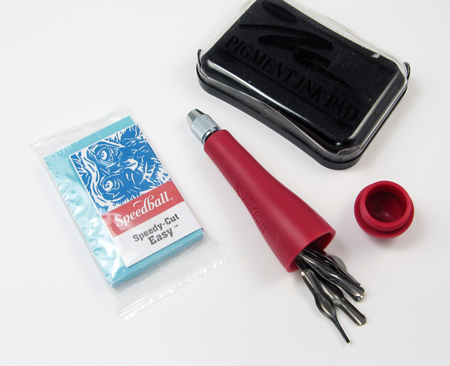
- I bought the Speedball linoleum cutter. [Google search tip: Don't just search "speedball" by itself or you will get a lot of drug references!] Many stampers seem to use only the number 1 and 5 cutters. I didn't need the other numbers either, but I liked that with this version of the cutter, the end opens up and you can store the carving tips inside the tool itself.
- I also bought the Speedy-Cut Easy Block. Some stampers use erasers and linoleum blocks, but for my first stamp I wanted something that would be extra easy. I bought the 2 x 3 inch size, the smallest one. I typically work on a very small scale, but I think maybe it would have been a little easier to make my first stamp on a slightly larger size. On the other hand, having a small stamp (smaller than my ink pad) did make it easy to do the actual stamping.
- I used the ink stamp pad because it was what I had around.
Designing
- Go simple for your first design.
- Think about whether you want a complete or incomplete design. What I mean by this is to think about whether you want the design to stand alone or if you're making something you want to embellish yourself. I knew I wanted to be able to draw some of my own elements in pen and not have everything stamped, so I drew an empty birdhouse. This gives me a lot of flexibility in how I can use this stamp in the future. (See the photos at the end for two different ways I used my stamp.)
- In a similar vein, I liked the idea from Geninne Zlatkis's book Making An Impression that you make different elements (such as a cactus and a planter) separately so that you can combine them in different ways.
- You can draw first on paper with a pencil and then transfer the design by rubbing it onto the block. This is especially important if you're going to do lettering, as the lettering will need to be backwards on the stamp in order to print correctly on paper. I just drew my design freehand directly onto the block.
- If you are going to do lettering on the stamp, A Beautiful Mess recommends making thick letters because they are easier to cut out. (In her tutorial, it looks like she used a Sharpie marker for some of hers.)
Carving
- Think about which part of your drawing you want inked and where the blank spaces should be. This way of thinking does not come naturally to me, but I think it would be easier with practice.
- Straight lines are easier than precise curves. That circle in the middle of my stamp proved challenging. After I finished, I read on Artist Network blog that for curved lines, you should rotate your block, not the cutting tool. (That blog also has a good reminder to always angle the sharp blades away from yourself!)
- Fox and Hazel recommends that you carve slowly to ensure that your carving is even.
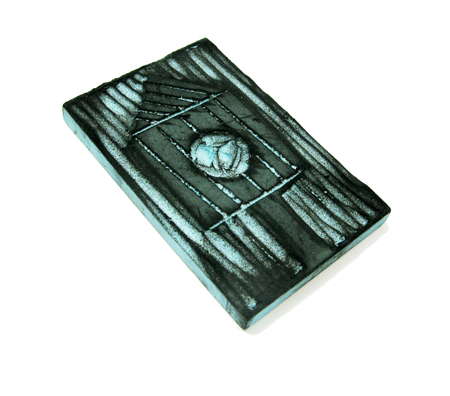
- Do a test stamp. If you don't like how it turns out, you can do more carving. I cleaned out the circle on the birdhouse more after the first test stamp. I didn't eliminate every extraneous line because I did want a handmade, hand-drawn type of look.
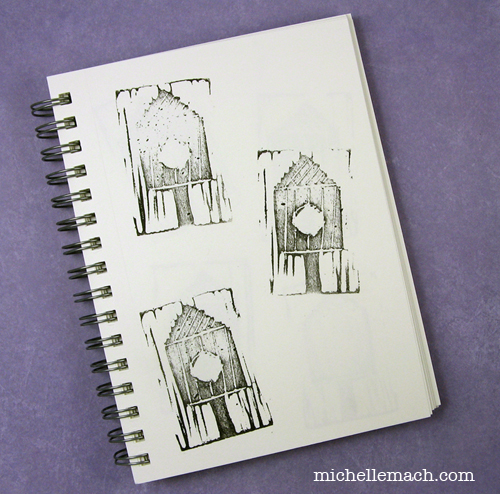
- One of the tricky parts as you can see from my samples was trying to get an even print. I learned from Dear Handmade Life that it would help to mount the stamp on a wood block so that I can apply even pressure. (My stamp pad is also fairly old, so it also might just help to have some fresh ink.) I don't plan to mount this stamp, but it seems like a worthwhile idea if you're going to use a stamp repeatedly.
The Rubber Stamp In Action
Here's the stamp used on blank postcards and colored with pen:

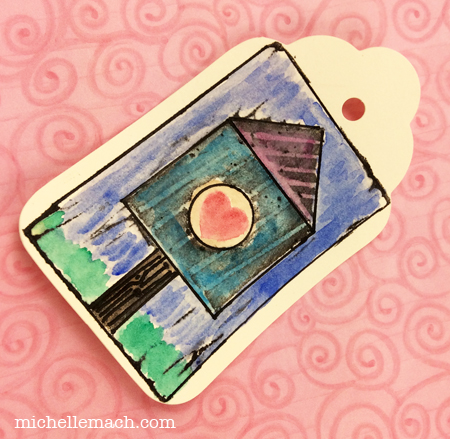
Here's the same stamp colored with watercolors (and a little black pen) on a gift tag:
I hope I inspired you to try carving your own stamp. I know I'm eager to try my second one!
Happy stamping!