A Few Thoughts About Blue Ink Pens
Blue or black ink?
Do you have a preference? (If you do any kind of writing by hand, I bet you do! You're not alone either. Did you know that there are entire podcasts devoted to stationery, pens, and pencils?)
I personally have always loved writing in black ink. It just looks so crisp and authoritative on the white page. Blue ink makes me think of required writing for school. I have some bad memories of blue ink -- those leaky, cheap PaperMate pens and those Bic pens that always seemed to lose their caps or worse, seemed to get chewed up by every anxious kid in middle school.
I recently needed blue pens to write some postcards, so I started buying and testing blue pens. I don't particularly like the feel of ballpoint pens; I prefer markers or gel pens that can make thin lines and have bright tones. I also didn't want to spend too much money. I thought I'd share what I learned in case you are looking for some new writing pens.
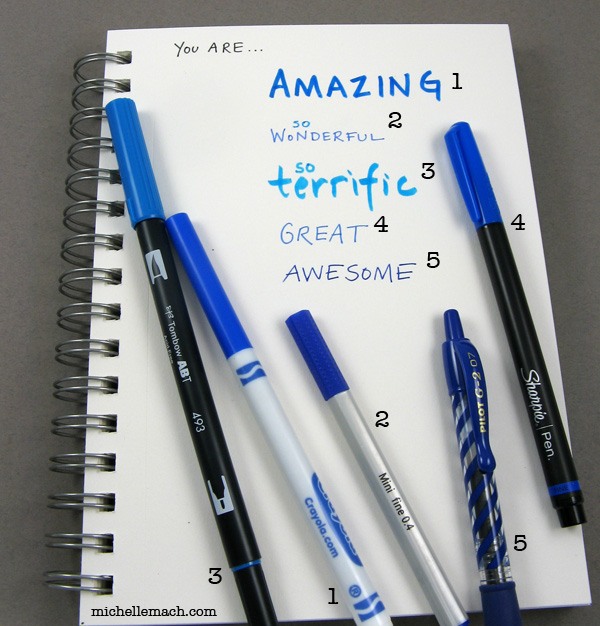 1. Crayola Fine Line Markers
I bought this set of ten markers during the back-to-school sales, so they were hands-down the cheapest markers I found (99 cents). While the packaging describes the line at "thin", it's really not that thin from an adult's perspective if you're writing on a small space like a postcard. (They'd probably be perfect for poster board for the science fair.) The color is nice and bright, a good solid blue.
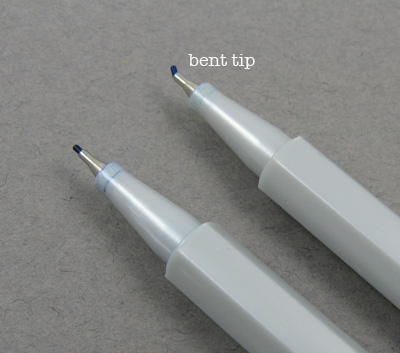
2. Mini Fineline Markers (Hobby Lobby)I bought this pack of 12 thin markers ($6.99) because I liked the variety of unusual colors (like mint green) that it included. They were also tiny, the shortest pens I bought. (There is something irresistible about things that are so small.) The set had two different blue pens, a light and a dark. The lines were really thin, perfect for writing. However, I tend to press hard on my pens and a couple of the tips were damaged after only a few weeks. I also found that writing with such a short pen is not very comfortable for long periods of time. These pens were the most disappointing of all the ones I tried.
3. Tombrow Dual Brush Pens
These were the most expensive markers I bought with a single package of 10 being $17 on sale at Michaels. (Regular price is listed at $26.99.) The colors come in a huge range, the most of any pens that I looked at. (You can even buy a set that is just shades of gray!) I bought the Bright set. These were dual-tipped pens with a brush tip at one end and a thin pen tip at the other. I really liked the pretty colors and brightness of these pens, although some (particularly the red) did not seem true to the color on the cap. (See the photo near the bottom of the page.) I liked how thin the pen lines were and I look forward to learning how to do some brush lettering so I can use the other end with more grace. While I thought the light blue was pretty, I decided I preferred a more medium shade.
4. Sharpie Marker Pens, Fine Tip Online I saw that other people were using Sharpies to do their postcard writing. I'd really only thought of Sharpies as those thick markers, so seeing a package of fine line Sharpies was a revelation. Target sells a pack of three with red, blue, and black for $5.29. The red is very faded, but the blue is a nice blue, a bit on the lighter side. What I like about these pens is that they can take a lot of pressure and they don't bleed through the paper. They are water-resistant, which is a nice touch for postcards that will be exposed to the elements during mail delivery.
5. Pilot Retractable Gel Pens With Comfort Grip
I bought the "fashion collection" of these pens at Target for $6.59, which includes five colors: teal, purple, red, blue, and black. (An aside: I found the description of these as "fashion" pens hilarious. Look at me with my couture outfit and my matching pens! It reminded me of those "pens for women" that were ridiculed in Amazon reviews a few years back. One of my favorite pen reviews: "It makes me feel so feminine and pretty ... It has given me soft skin and manageable hair ... My drawings of kittens and ponies have improved ..") That said, I love how vibrant these colors are. This pen had the brightest, prettiest blue of all the pens I tried. They have a hard metal nib, so I don't have to worry about damaging them. They're also refillable, which is a nice bonus. The downside is that the nib does dispense a lot of ink. You can see the ink sitting there wet on the surface of the paper. I've found that I need to pause after writing each sentence so that I don't accidentally smear the ink. (I think these pens would be really difficult to use as a left-handed person for this reason.)
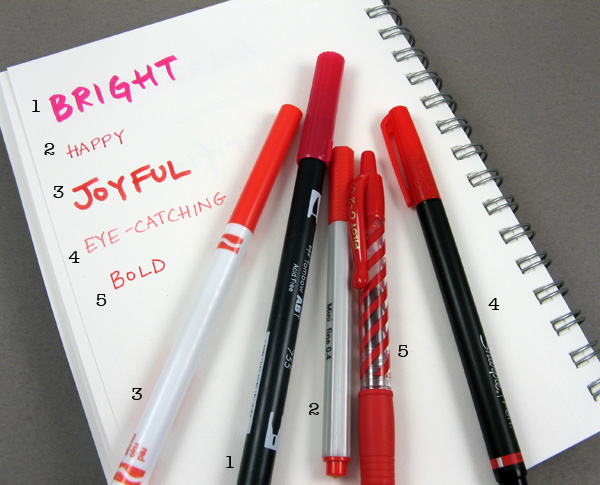
Bonus: Red Pens
Since the blue pens I bought all came with red pens, I did a quick test on them. The reds had much more variety in terms of color from a faded red to a decidedly bright pink. The Crayola and the Pilot had the truest reds.
Conclusion
I ended up switching between the Pilot and the Sharpie pens for my postcards, relying a bit more on the Sharpie since I don't have to be so careful about the ink smearing. It's not quite the perfect solution, but it's close.
If you have suggestions for moderately-priced writing pens, I'd love to hear them. In the meantime, write on!
 Earlier this year, I had my first handmade jewelry components published in an issue of Beadwork. Now I'm excited to make more! This summer I'm challenging myself to make new jewelry components, one type each for the months of June, July, and August. I'll be using different shapes, motifs, and materials as a creative challenge.