 Earlier this month I had a booth at a small craft show.
Like many makers, custom or personalized orders make up a sizable percentage of my work. So one of my first questions when preparing for the show was:
Should I take custom orders at a craft show?
Short answer: No.
I agree with 3 Good Reasons You Should Not Take Custom Orders At Craft Shows that this adds an unnecessary layer of complication and probably won't be financially rewarding. Many people who visit craft shows aren't looking for something specific; anything they buy is typically an impulse purchase. If you only offer custom items while at shows, you might find sales very slow unless you can make them while people wait.
For me, custom orders require a lot of back-and-forth communication unless the order is relatively straightforward like adding a date to an existing keychain design. Even at a very slow show with only one person at my table, it may be difficult or even impossible to hammer out all the details including figuring out a final price (with supplies you may not normally carry) and an estimated shipping date.
For makers whose customization options consist of simple color changes from an existing palette, it might make more sense. If you do decide to go ahead, then have a form like this one (link near bottom of post) from The Paper Craftery ready to fill out. Made Urban also has some smart ideas of how to make custom orders work at a craft show.
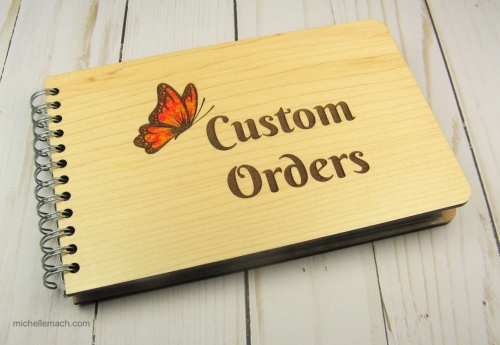
But even if you're not taking orders, that doesn't mean that the possibility of future custom orders should be totally overlooked.
I've seen some cute signs at craft show booths that mention custom orders. Be sure to have business cards or contact information nearby if you choose to go this route.
Other crafters have used digital photo frames to show rotating pictures of their work, but I wanted something tactile that customers could pick up.
How do you make a photo album? 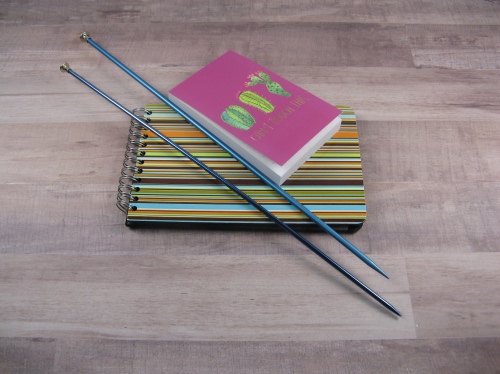
You can have an album professionally printed as a hard or soft cover book with a company like Shutterfly or Snapfish. If you're pressed for time (and who isn't the weeks before a show?), this is an easy, efficient way to go. Since you're a creative person, think about small touches you could add to this commercially printed album to reflect your style. It could be as simple as choosing a color for the cover that works well with your display or maybe adding a sticker with your logo.
You can also make your own album. This was the route I took. Here's what I was looking for:
- Open sleeves (rather than printed pages) so that I could switch out photos
- Ring binding or something similar that allowed the album to lay open flat
- A small size not much larger than the single 4 x 6" photos themselves. (This proved more difficult than I expected. Many off-the-shelf photo albums are sized for two photos per page.)
I ended up finding a small striped album at my local art recycle shop for a dollar. (The knitting needles and cactus notebook have nothing to do with this project; those were just my craft haul that day.) I removed the back and front cover and engraved my own wood covers. I had the photos printed at a local small business.
How do you decide what to include in a custom order photo album?
- Show a wide range of your work: different materials, finishes, sizes. Since I sell jewelry, I made sure to include necklaces, earrings, and bracelets, even though most of my custom orders are for keychains. I also showed a few Christmas ornaments, even though it's nowhere near the holiday season. (Some people do shop for Christmas very early or even all year round.)
- Include only orders you want to make again. This may be obvious, but if you made a custom order that made you cry because it was so complicated and/or tedious, omit it here. It's very common for people to want to order a variation of what they see!
- Respect your customer's privacy and share very limited (non-specific) personal information. For example, I included the photo of a keychain that had the initials "A + J." That could apply to a huge number of people; it's not that specific. On the other hand, I did not include the custom bookmarks I made for a wedding that had the full names of the bride and groom and their wedding date. Basically, you don't want to give out enough information that someone could track down those specific individuals. (I've seen photos where crafters blur out the personal information, but I personally find that distracting.)
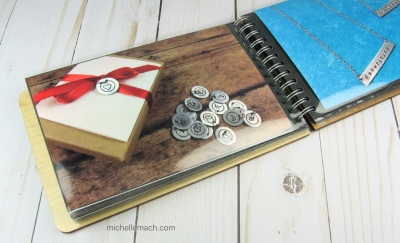
- Go small. My photos were 4 x 6 inches, which seemed just about right for very small products. The finished album did not take very much space on my small table. If you make large items, consider including an image of the whole piece plus some detailed close-ups.
- Make it beautiful. The photos in this book don't have to be simple product shots on a white background. It can be helpful to show photos of how your products might fit in a person's lifestyle, using backgrounds or props. I actually used many of my photos from my social media accounts. (If you're going to spend a lot of time styling photos for social media, you might as well get some use out of them!)
- Limit your scope. I've made hundreds of custom orders over the years, but I only included 20 photos. I tried to use photos only from the last couple of years since those are more representative of the work I'm doing now. You'll have to see what number works for you. I found that once people picked up the album, they did look through every photo. It wasn't overwhelming for those serious customers.
- Add written information if needed. I did not do this, in part because it gave me some natural talking points to explain what was in some of the photos. (I recommend this strategy to other introverts!) But you might find it important to highlight differences that are not obvious in a photo (like the difference between silver-colored metals). You could jot details on the back of the photo or include a little reference card for yourself.