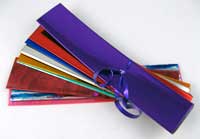
 When I was asked to review the new Friendly Plastic materials, of course I said yes. I love trying new things and telling people about them! I thought I'd spend an afternoon or two experimenting, but I ended up sneaking down to my studio all week whenever I had a free moment. It's seriously addictive!
There are a few different ways to melt Friendly Plastic—hot water, heat gun, griddle, and oven. I used the toaster oven that I use for polymer clay. Here are a few of my projects: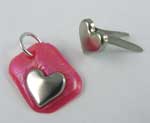 A Quick and Easy Charm
I wanted to share this so you could see it's possible to create a cute project right away. I rounded the corners of a small piece of Friendly Plastic before I melted it. Then I cut off the ends of a heart-shaped brad found in the scrapbooking section of the craft store and pressed that into a square of hot plastic. I did not use any glue, but you could use some for extra security. I added a tiny hole with a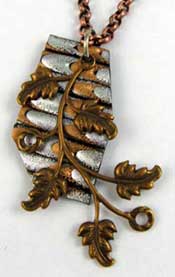 needle tool while the plastic was still hot and placed a jump ring through the hole once it cooled. Super easy and great for quick gifts like wine charms, earrings, and key chains. Hooray, immediate gratification!
A Mixed Metals Layered Pendant
For my next project, I used some of the silver and gold sticks. I cut the sticks into strips and placed them next to one another to melt. Then I ran the comb tool through them to make a marbled design. I cut off parts of the rectangle to make it seem more freeform and punched a hole in the top with my mini hole punch. I inserted a silver jump ring, layered a cool brass leaf pendant from Ornamentea, and strung the piece on some copper chain. This is a simple way to add texture and color to a piece.
A Looks-Like-Dichroic Glass Butterfly Pendant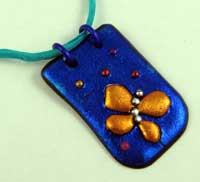
I used my mini hole punch for this pendant. I punched out the tiny dots from several colors of Friendly Plastic and placed them on the blue background. It was a challenge working with such tiny pieces—I ended up using tweezers to get the dots placed exactly where I wanted them. Since the dots had a tendency to fall off just as I was placing the piece in the oven (arggh!), I ended up making this pendant in stages. I kept adding dots and placing it back in the oven. I really appreciated the flexibility of being able to keep reheating the piece until it was finished.
A Mixed Media Pendant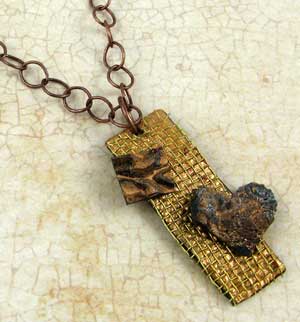 To make this pendant, I pressed brass WireForm WireMesh into the hot plastic. Then I made the two layered pieces separately by pressing a rubber stamp into the hot plastic, cutting out the shapes when cool, and gluing them on the pendant. I didn't realize that my stamps still had old black ink on them, but I decided that it gave the pieces an antiqued look. Sometimes mistakes make the best creative discoveries!
- Save your scraps and mistakes! You can always reheat the piece and start over. This is the ultimate "do over" material.
- It's easy to cut Friendly Plastic
with regular scissors. Fancy scissors (the kind with curvy lines)
don't work well. I assume it's because they're not sharp enough to cut
through thick plastic. My attempt at using those scissors made the
plastic look like it'd been gnawed by a cat. But given that you can "erase" rough edges by heating the plastic, this was not a major problem.
- Leave the stamp in until the plastic cools, then it will be easily
removed. If you have any remaining ink on the stamps from a previous
project, it might come off on the plastic. I did find it useful to oil my stamps before using them.
- Plan ahead, but be flexible. You do need to work quickly with the oven method of heating, so you have your materials—stamps, wire comb, wire mesh—ready
to go. At the same time, just as with any other type of craft, be
ready to let go of your original plan and experiment. Sometimes the
best ideas come when your original idea doesn't work!
- As tempting as it is, do not touch the plastic while it is soft. I've heard that it can be extremely sticky. (Who am I kidding? I know this from first-hand experience!)
Your Turn: Take the Design Challenge and Win $100
For more design ideas, check out the Friendly Plastic blog.
Also, be sure to check out this year's design challenge. There are four categories to win, including one for artists under the age of 15. You can win $100 for yourself, plus $100 for your favorite charity. Entries are due November 6, 2009. Good luck!