A mom recently asked me what was the bare minimum you needed to begin metal stamping. Her teen wanted to try it, but the mom had mixed feelings. On the one hand, she wanted to be supportive and encouraging, but on the other hand, she didn't want to spend too much money since she knew that the teen might lose interest quickly.
Here's what I told her to look for:
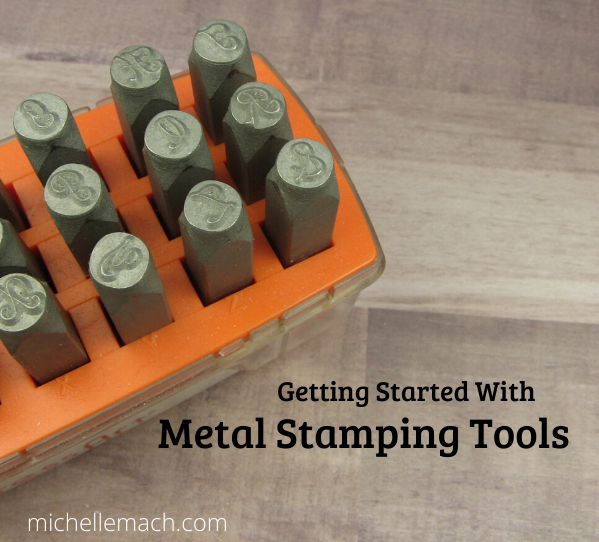
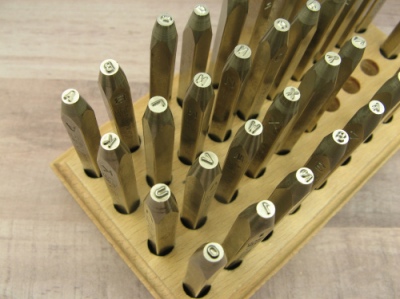
Metal Stamps
This is the fun part! There are a ton of different fonts and designs that you can buy. Font sets can range from $10-$200 for a single alphabet (with lowercase, uppercase, and numbers often sold separately). For a beginner, I'd recommend one inexpensive stamp set in a simpler font. Elaborate cursive fonts and design stamps with lots of tiny details take more practice to stamp well.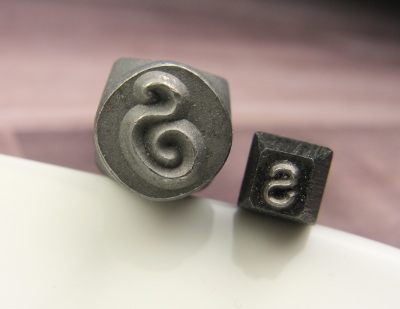
You do get what you pay for, so be aware that if this becomes a serious hobby you will likely spend more on stamps. More expensive stamp sets will be marked on the outside of the stamp. This helps to ensure that you have the letter positioned right-side up when you stamp. Sometimes even cheaper sets will have a notch on the side which helps you stamp correctly.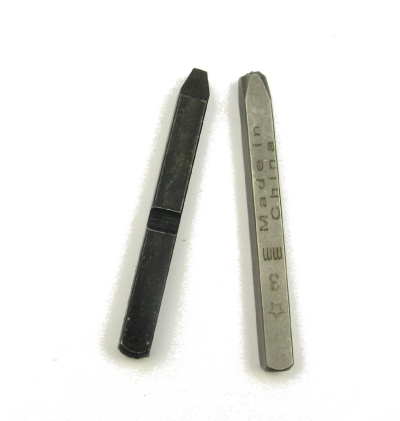
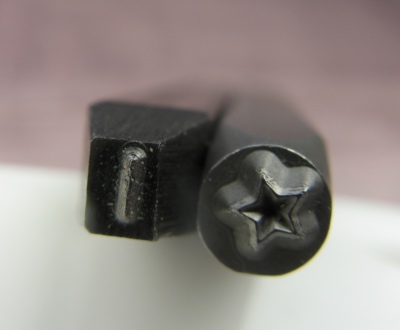
More expensive sets are also likely to contain letters that are centered on the bottom of the stamps, making it easy for you to make your words and phrases aligned. This is not the case with cheaper sets. In the photo, notice how the letter "l" is off to one side and how the star touches one of the stamp edges.
You'll typically pay more for stamp sets with specialized alphabets and those that can stamp on harder metals like steel. You can find cheap sets of plain fonts at the hardware store.
As far as stamp size, typically 2-3mm stamps are the most useful for creating small items such as keychains or pendants. Very large stamps (like 6mm) are typically used for creating single letter monograms.
Metal
I recommend that beginners use aluminum. It's a softer metal, so you can still make your letters show up even if you don't have a lot of hand/arm strength. Craft stores sell aluminum blanks in all sorts of fun shapes. If you know you want to make items like earrings or pendants that require a hole, be sure to look for shapes that already include one. (Otherwise, you'll need to buy a metal hole punch.) Once you get some experience, you can experiment with brass, copper, sterling silver, or steel.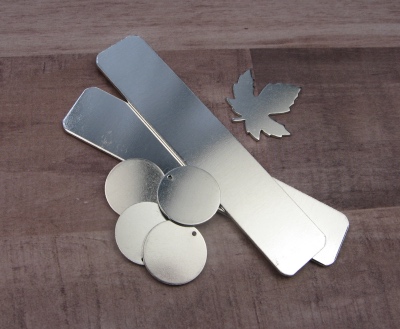
Hammer
While you might be able to use something else (your shoe, for example) to pound on a stamp, a hammer will ensure you make even marks. You'll want to use a hammer with a brass head. A softer metal head means that the energy from the hammer will go into the stamp. With a steel head (the kind found on your normal household hammer), the energy bounces back into the hammer and make it harder for you to get consistent results. The craft store hammers are cute, but hammers at a hardware store can sometimes costs less.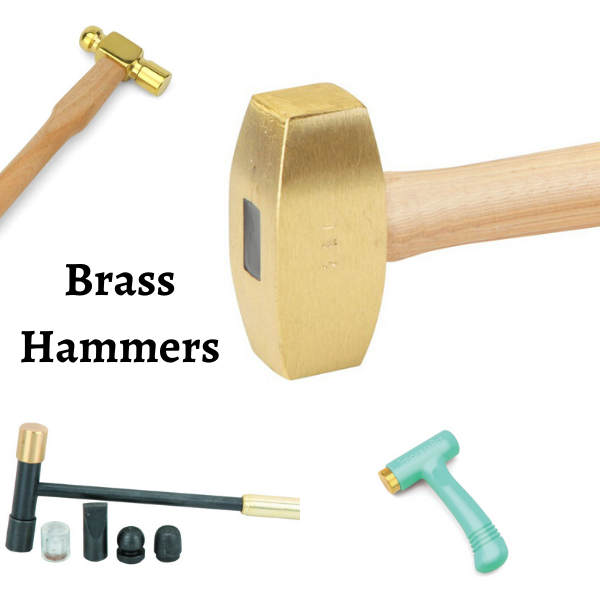
Bench Block
A steel bench block will give you a smooth, firm surface to work on. This is the piece that new stampers seem to resist buying the most. The other items are fun to buy; a plain square of metal is not.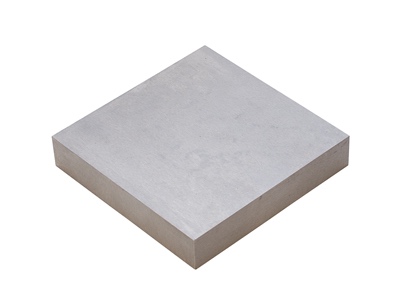
What about alternatives? Well, you can just set your metal on the driveway and hammer it. This will work if you only want to hammer one or two things and aren't too particular about the results. You will get the rough pitted texture of the driveway on the back of your piece. If your metal is very soft (like aluminum), it might bend during the hammering process. You also could end up causing some chips in the cement when your hammer misses its target.
What about something else like a piece of wood? A piece of wood will likely be too soft and might splinter when hammered. While eye protection (like a pair of goggles) is a good idea no matter what you're hammering, it's especially important if you're using a non-traditional stamping surface. This is a bad time to make a run to the emergency room.
Extras
There are lots of other supplies you could buy once you've decided that you really like metal stamping and want to do more:
- tape to hold down your piece while you stamp
- organization containers for stamps and tools
- a cushion or pad for your bench block to deaden the noise
- a stamp holder to keep you from smashing your thumb with the hammer
- graph paper or other special paper for design work
- custom designed stamps with your own drawing or design
- special paints or ink to darken the stamped impressions
- a tumbler or polishing cloths to brighten your finished pieces
- a metal hole punch to add holes to shapes
- a jeweler's saw and blades to cut your own custom metal shapes
- mandrels for bending and sizing rings and bracelets
- something cool that wasn't invented yet when I wrote this blog post
One last point: You can often find beginner kits in the craft stores and these can be a good value, typically costing less then if you buy items individually. Craft stores offer coupons and run sales, making items even more affordable. You can also sometimes find used supplies on Etsy, eBay, or in your local craft reuse store.
Happy Stamping!